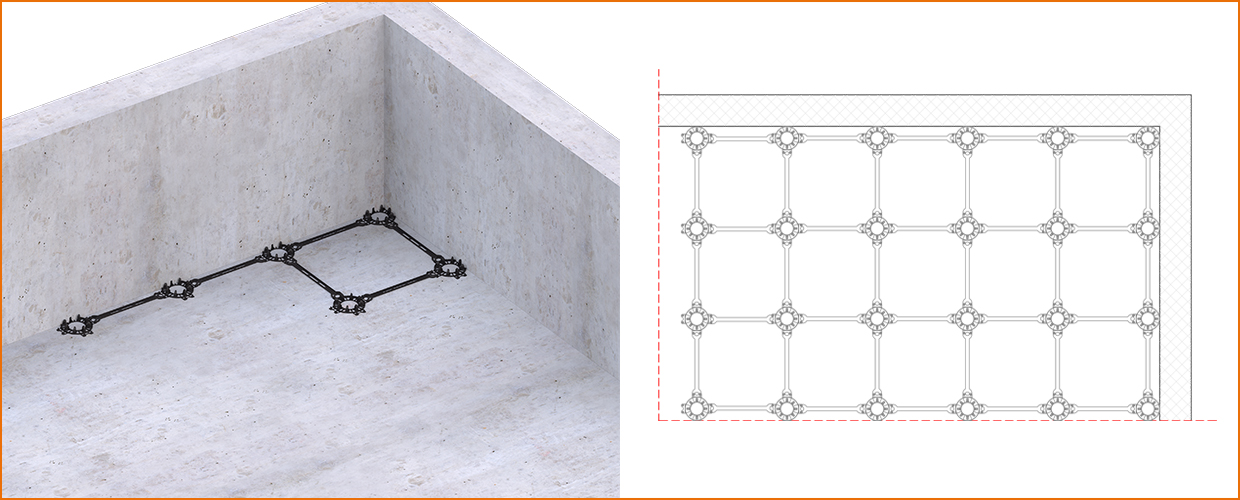
1. Create the grid
Connect the base pedestals and spacers to create a rectangular grid throughout the laying surface. The grid will keep the upper parts of the system stable and create a guide for MEP installations.
Installation guide for Elevetor Max

Elevetor Max is the newest addition to our Elevetor family of solutions for lightweight structural fills. Together with a fast and intuitive installation it inherited from its predecessor, the New Elevetor, Elevetor Max offers a larger top formwork and multiple tube sizes for even greater customization possibilities. Here is how it works.
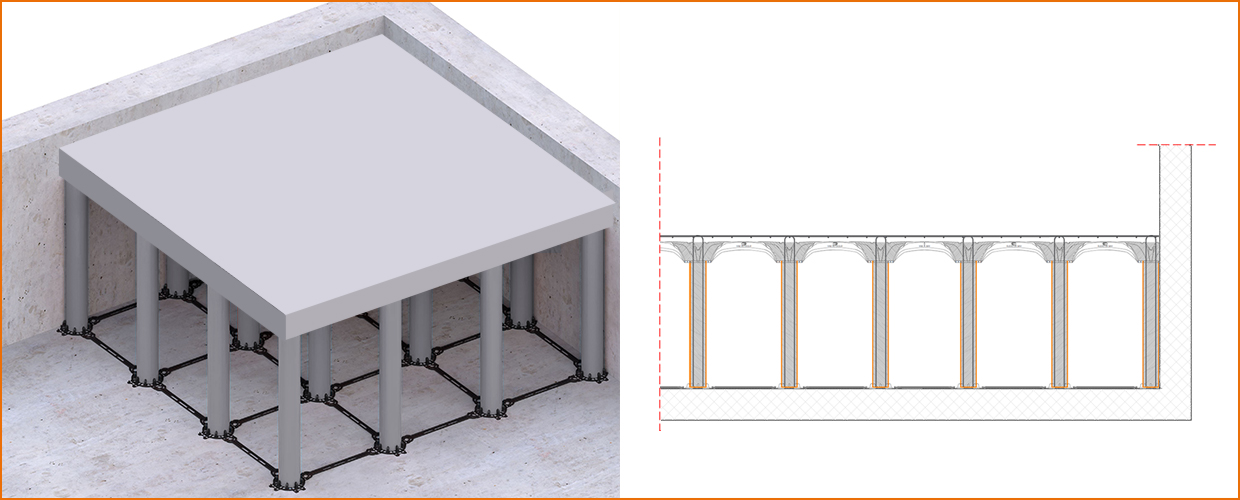
Elevetor Max components
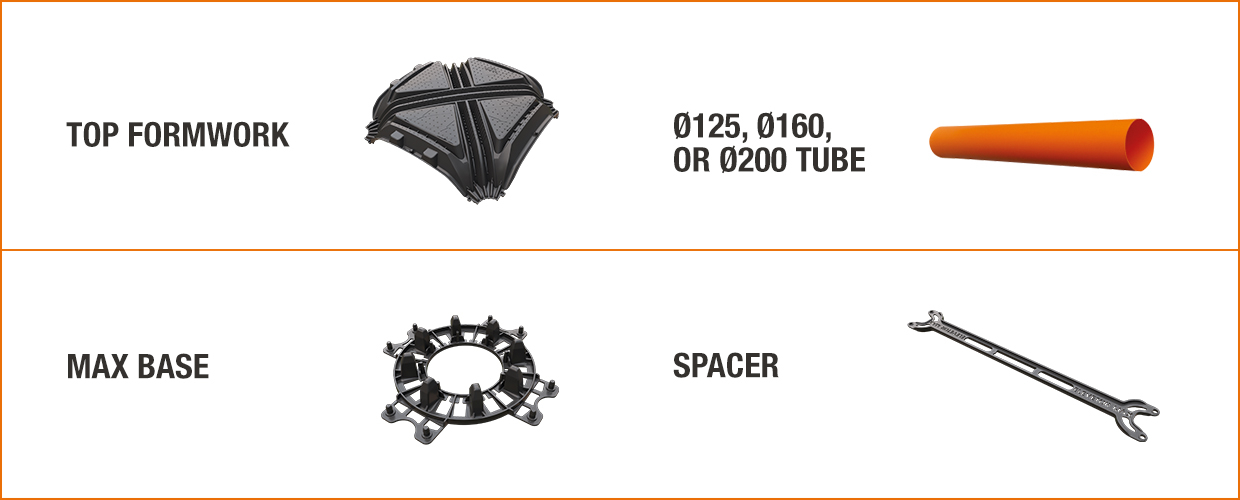
Elevetor Max is composed of:
- Large 71 x 71 cm top formwork,
- Vertical Ø125, Ø160, or Ø200 mm tubes of up to 3 m in height,
- A bottom grid composed of Max base pedestals and spacers.
Elevator Max 4 step installation
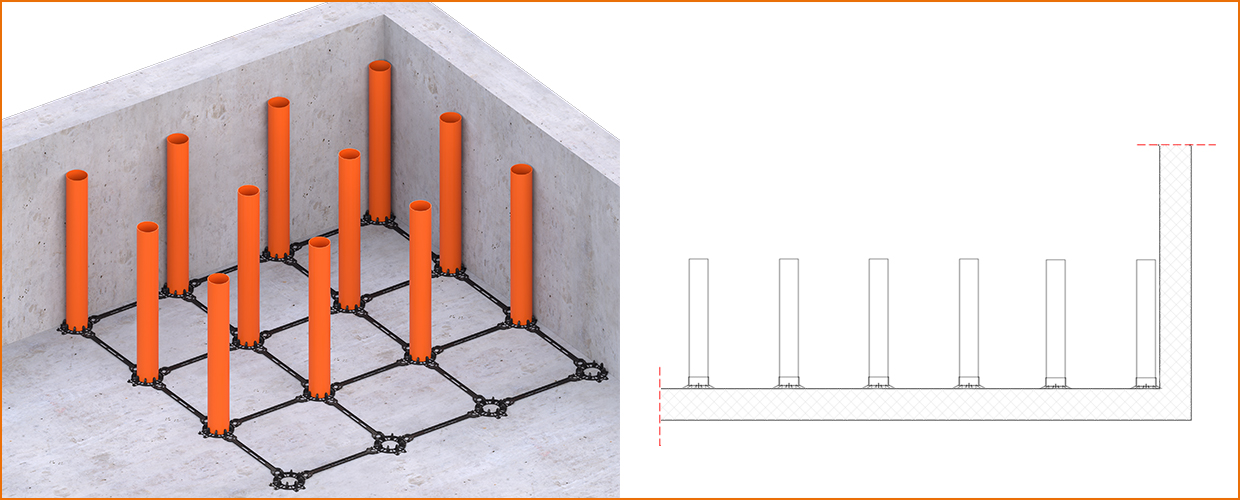
2. Place the tubes
Fit the tubes into the pedestal brackets. The tube height can be adjusted by cutting to size according to project requirements.
Fit the tubes into the pedestal brackets. The tube height can be adjusted by cutting to size according to project requirements.
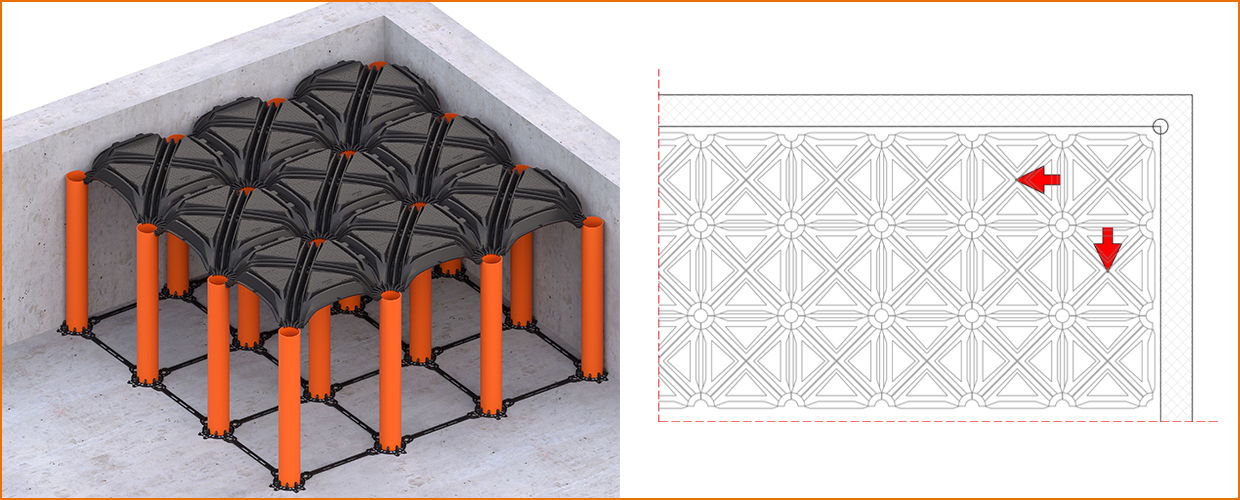
3. Place the formwork
Place the formwork on top of the tubes to close the system. The formwork should be installed from right to left and from top to bottom.
Place the formwork on top of the tubes to close the system. The formwork should be installed from right to left and from top to bottom.
4. Pour the concrete
Install the rebar and pour the concrete, keeping the pump as near to the formwork as possible. Fill the pipes and capitals first, then restart from the initial point to pour the slab.
Install the rebar and pour the concrete, keeping the pump as near to the formwork as possible. Fill the pipes and capitals first, then restart from the initial point to pour the slab.
To purchase or learn more about Skynet email Luca Zausa at luca.zausa@geoplastglobal.com