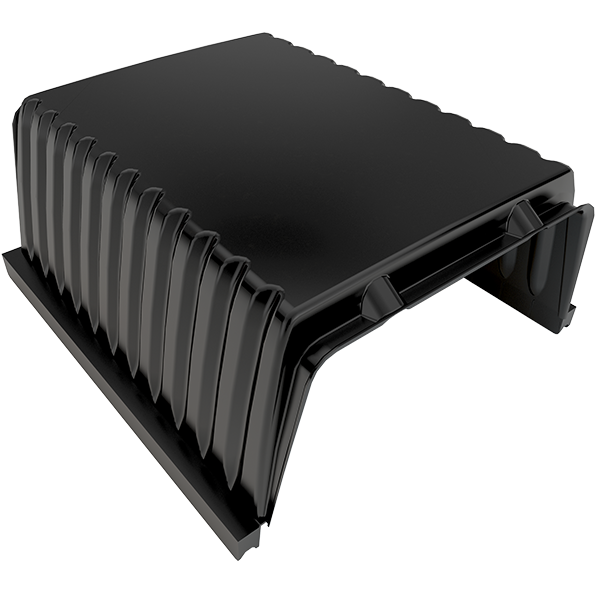
SKYRAIL is moulded in ABS resistant to UV rays and chemical agents.
| ITEM | AXLE SPACING (cm) | SPAN (cm) | SKYRAIL HEIGHT (cm) | BASE HEIGHT (cm) | TOTAL HEIGHT (cm) | RIBBING (cm) | CONCRETE CONSUMPTION UP TO THE TOP (m3/m2) | CONCRETE CONSUMPTION (m3/m2) | PROPS SPACING (m) |
| SKYRAIL_H16 | 60 | 51 | 16 | 4 | 20 | 9 | 0.033 | 0.073 | 3 |
| 60 | 51 | 16 | 5 | 21 | 9 | 0.033 | 0.083 | 3 | |
| SKYRAIL_H20 | 60 | 51 | 20 | 4 | 24 | 9 | 0.044 | 0.084 | 3 |
| 60 | 51 | 20 | 5 | 25 | 9 | 0.044 | 0.094 | 3 | |
| SKYRAIL_H24 | 60 | 51 | 24 | 4 | 28 | 9 | 0.054 | 0.094 | 3 |
| 60 | 51 | 24 | 5 | 29 | 9 | 0.054 | 0.104 | 3 |
| ITEM | PALLET SIZE (cm) | PALLET NR. ITEMS / KG | |
| SKYRAIL_H16 | 120 X 112 X 230 | 208 | 540 |
| SKYRAIL_H20 | 120 X 112 X 232 | 204 | 570 |
| SKYRAIL_H24 | 120 X 112 X 235 | 200 | 620 |
| SKYBLOCK_H16 | 80 X 120 X 230 | 288 | 337 |
| SKYBLOCK_H20 | 80 X 120 X 233 | 284 | 389 |
| SKYBLOCK_H24 | 80 X 120 X 235 | 280 | 440 |
| T JOIST | 80 X 120 X 220 | 140 | 258 |
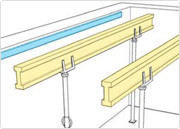
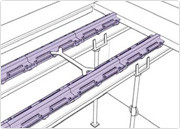
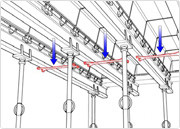
Place the iron props and the timber beams. Fix the supporting element to the wall.

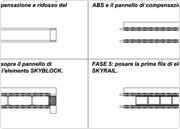
Place the timber compensation panel or a GEOPANEL 80mm thick.
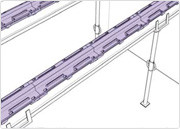
Place the 2 first rows of joists.
Place the timber compensation panel 25 mm thick.
Place the spacers between the joists.
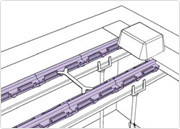
Place the SKY BLOCK element.
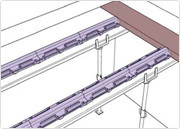
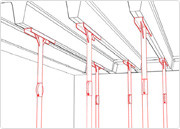
Install the first SKYRAIL element.
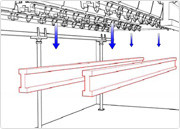
Install SKYRAIL elements fixing them to each other.
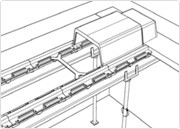
In order to correctly place the compensation panels, it is necessary to consult GEOPLAST project tables before installing the slab elements.
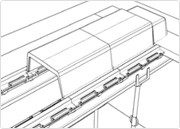
Remove the spacers.
Remove the props and the timber beams.

Remove the joists.
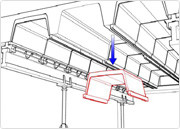
Remove SKYRAIL elements.
In correspondence of the ribs, shore up the floor as shown in GEOPLAST project tables until the complete curing of the concrete.